> ## Documentation Index
> Fetch the complete documentation index at: https://help.contentgrove.io/llms.txt
> Use this file to discover all available pages before exploring further.

# Install contentgrove tracking on WordPress

> Add contentgrove tracking to your WordPress site with the official plugin, so clicks and conversions are recorded on every page and stay up to date.

The easiest way to track a WordPress site is the official contentgrove plugin. It keeps the tracking file on your site, lets you manage everything from the WordPress admin, and updates itself from the Plugins screen. If you'd rather not install a plugin, you can add the script manually instead.

## Install the contentgrove plugin

<Steps>
  <Step title="Download the plugin">
    Download the plugin `.zip` — this link always gives you the latest version:

    <Card title="Download the contentgrove WordPress plugin" icon="download" href="https://app.contentgrove.io/api/wordpress-plugin/updates/contentgrove/download">
      The plugin zip, ready to upload to WordPress.
    </Card>
  </Step>

  <Step title="Upload it to WordPress">
    In your WordPress dashboard, go to **Plugins → Add Plugin → Upload Plugin**, select the `.zip` file, and install and activate it.
  </Step>

  <Step title="Open the plugin settings">
    Go to **Settings → contentgrove** in your WordPress admin.
  </Step>

  <Step title="Connect to contentgrove">
    Click **Connect to contentgrove**. This opens contentgrove to link the plugin to your account.
  </Step>

  <Step title="Approve the site">
    In contentgrove, choose the active workspace that should receive tracking from this site, then approve the connection. You need workspace admin or owner access.
  </Step>

  <Step title="Choose what to track">
    Leave **Entire site** selected so the script runs on every page, including your landing and thank-you pages. Only narrow this if you want to track specific pages or posts.
  </Step>
</Steps>

<Note>
  The site stays bound to the workspace you choose. To send tracking to another workspace, disconnect the site in **Settings → contentgrove**, then reconnect it and choose the new workspace. The plugin updates itself from the **Plugins** screen when a new version is released.
</Note>

## Updating an existing installation

Version 1.1 and later automatically confirm the workspace already attached to your installation. Tracking pauses briefly until that check succeeds, so data cannot accidentally be sent to another workspace. If WordPress shows a workspace synchronization warning, use **Retry workspace sync**. If the connection can no longer be verified, disconnect and reconnect the site.

## Alternative: add the script manually

If you prefer not to install a plugin, add the tracking script site-wide with the free WPCode plugin, which lets you insert code without editing your theme.

<Steps>
  <Step title="Open plugin installation">
    In your WordPress dashboard, go to **Plugins → Add Plugin**.
  </Step>

  <Step title="Install WPCode">
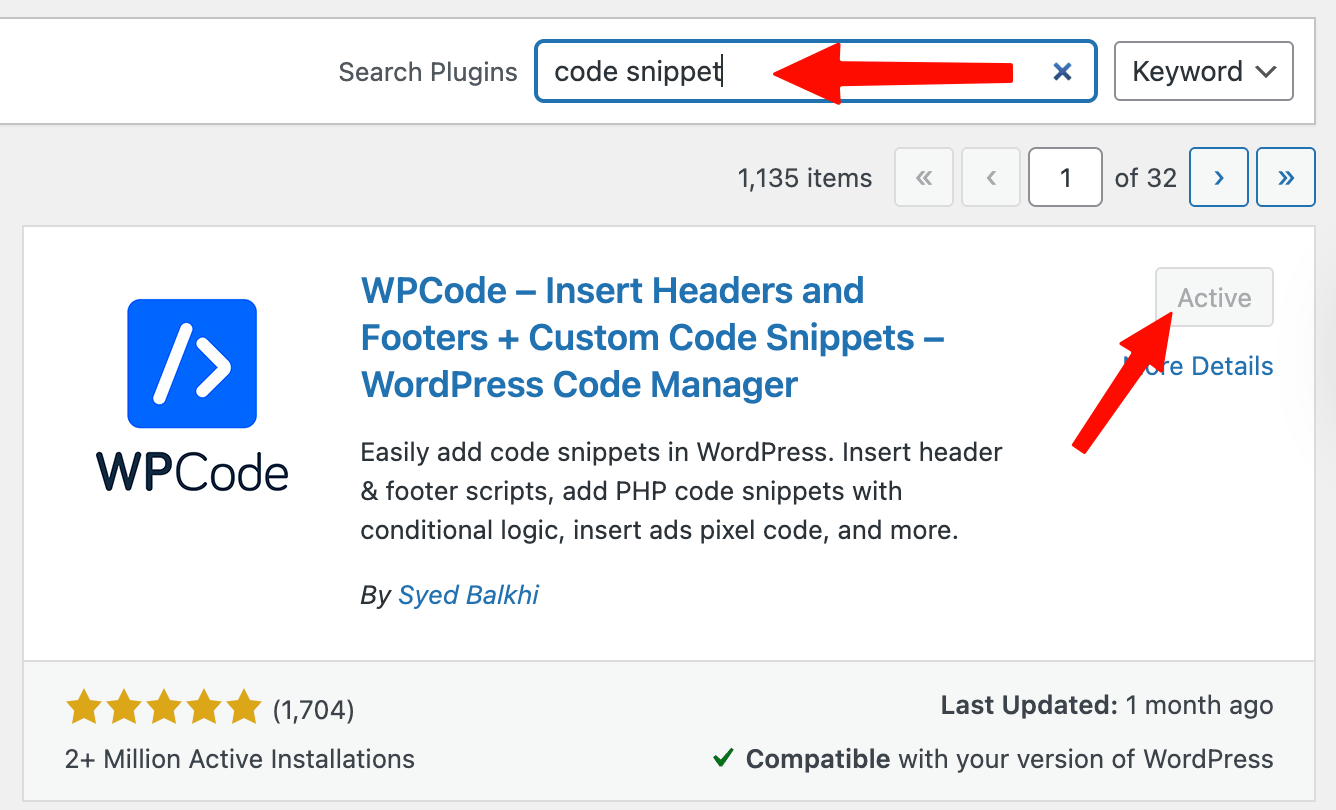
    Search for "code snippet", then install and activate **WPCode**.
    <Frame>
      <img src="https://mintcdn.com/contentgrove/M4nyy69B00uCNdVa/images/wordpress/01-install-wpcode.png?fit=max&auto=format&n=M4nyy69B00uCNdVa&q=85&s=c37227ac99d4cd7a596cca514dc75391" alt="Installing the WPCode plugin from the WordPress plugin directory" width="1336" height="810" data-path="images/wordpress/01-install-wpcode.png" />
    </Frame>
  </Step>

  <Step title="Add a new snippet">
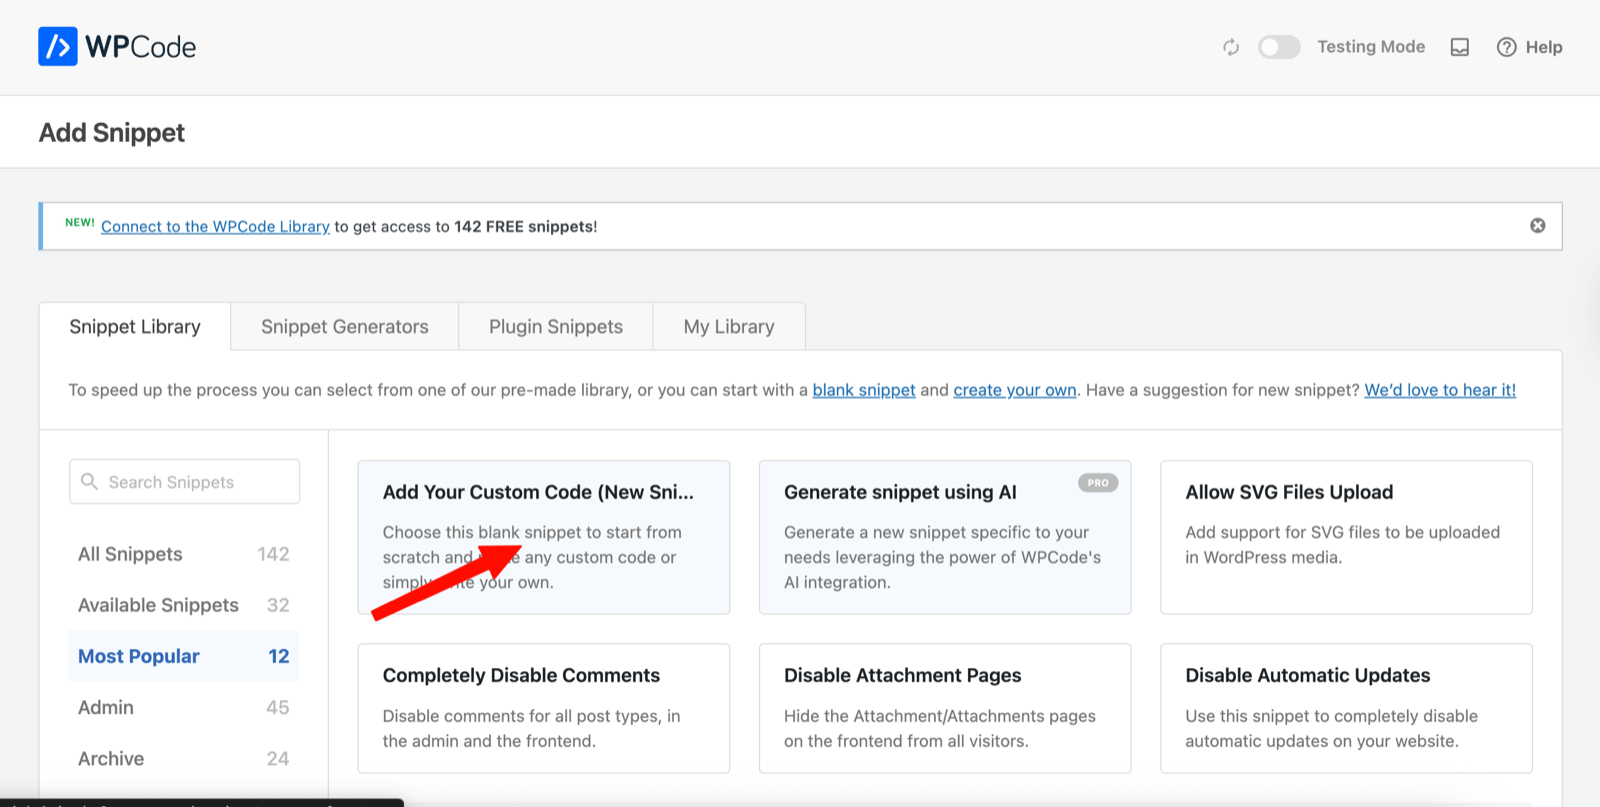
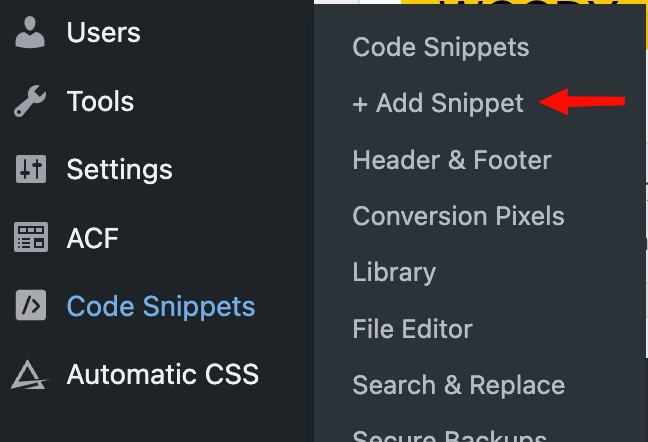
    Open WPCode and choose **+ Add Snippet**, then **Add Your Custom Snippet**.
    <Frame>
      <img src="https://mintcdn.com/contentgrove/M4nyy69B00uCNdVa/images/wordpress/02-add-snippet.png?fit=max&auto=format&n=M4nyy69B00uCNdVa&q=85&s=e6e7a8ce0ed47bc4cbc62955696d05fb" alt="The Add Snippet button in WPCode" width="648" height="442" data-path="images/wordpress/02-add-snippet.png" />
    </Frame>

    <Frame>
      <img src="https://mintcdn.com/contentgrove/M4nyy69B00uCNdVa/images/wordpress/03-add-custom-snippet.png?fit=max&auto=format&n=M4nyy69B00uCNdVa&q=85&s=d287e99660a0dbb83e7905492de9d7fd" alt="Choosing Add Your Custom Snippet in WPCode" width="1600" height="807" data-path="images/wordpress/03-add-custom-snippet.png" />
    </Frame>
  </Step>

  <Step title="Choose HTML snippet">
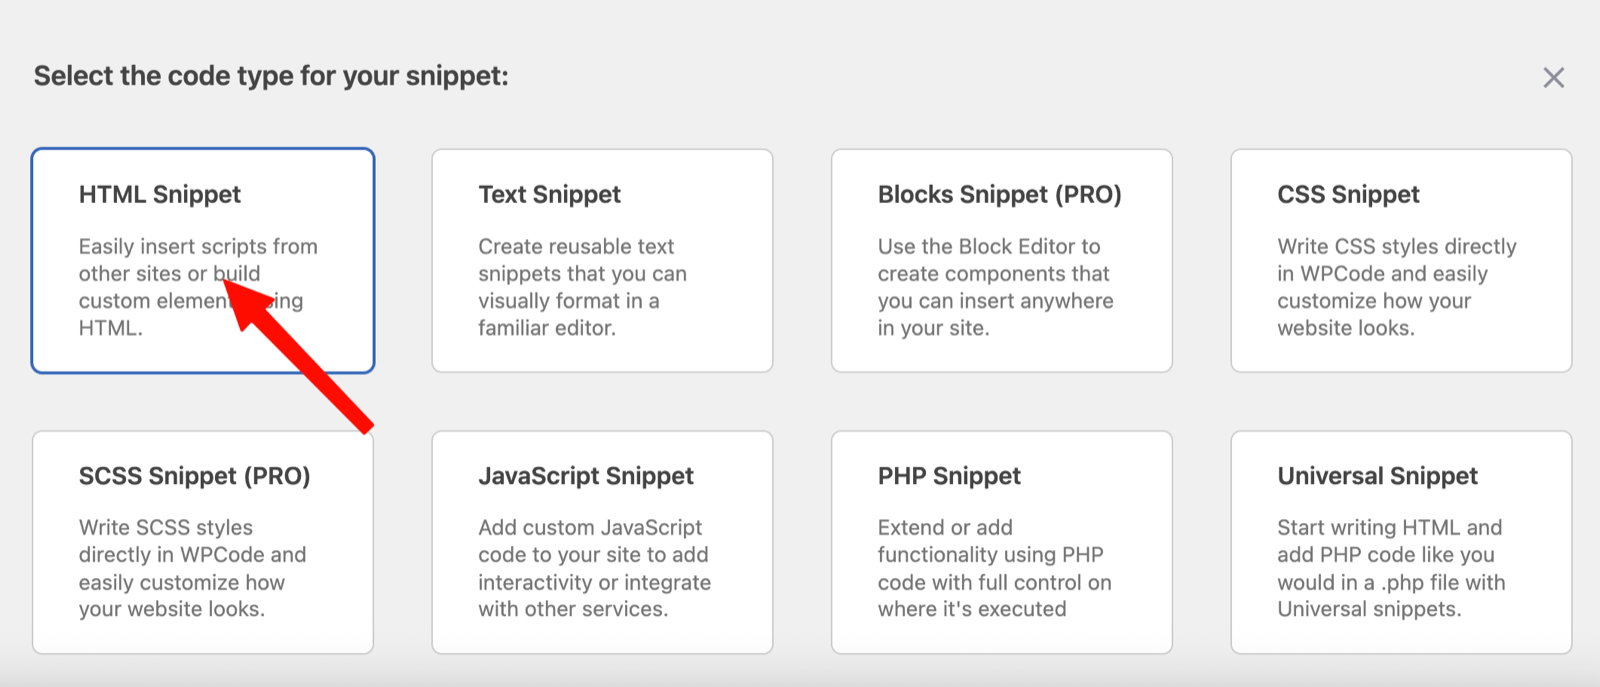
    Select **HTML Snippet** as the type.

    <Frame>
      <img src="https://mintcdn.com/contentgrove/M4nyy69B00uCNdVa/images/wordpress/04-html-snippet.png?fit=max&auto=format&n=M4nyy69B00uCNdVa&q=85&s=890e9e21b28260bd15a9ae602c4c234c" alt="Selecting HTML Snippet as the code type in WPCode" width="1600" height="687" data-path="images/wordpress/04-html-snippet.png" />
    </Frame>
  </Step>

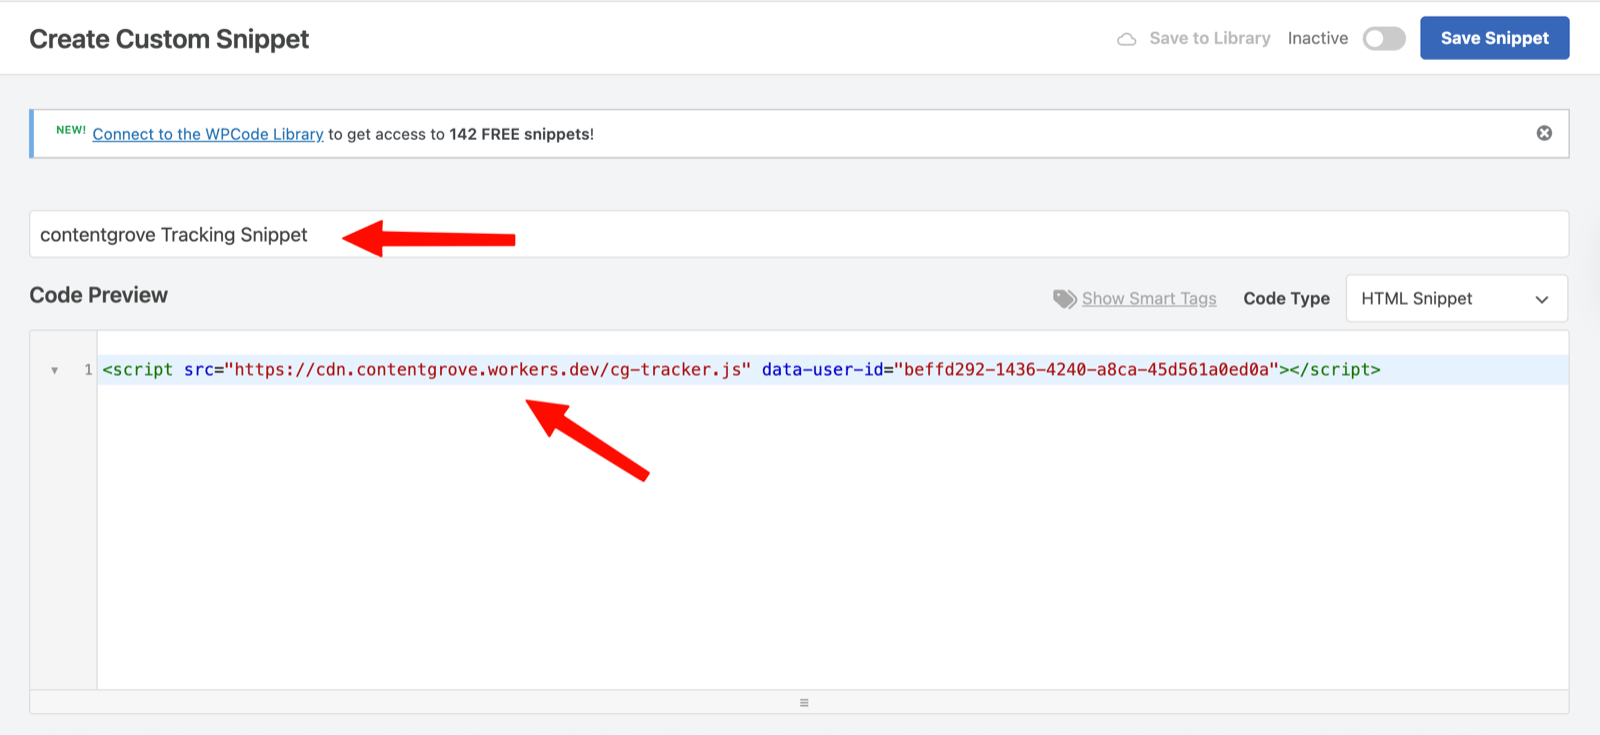
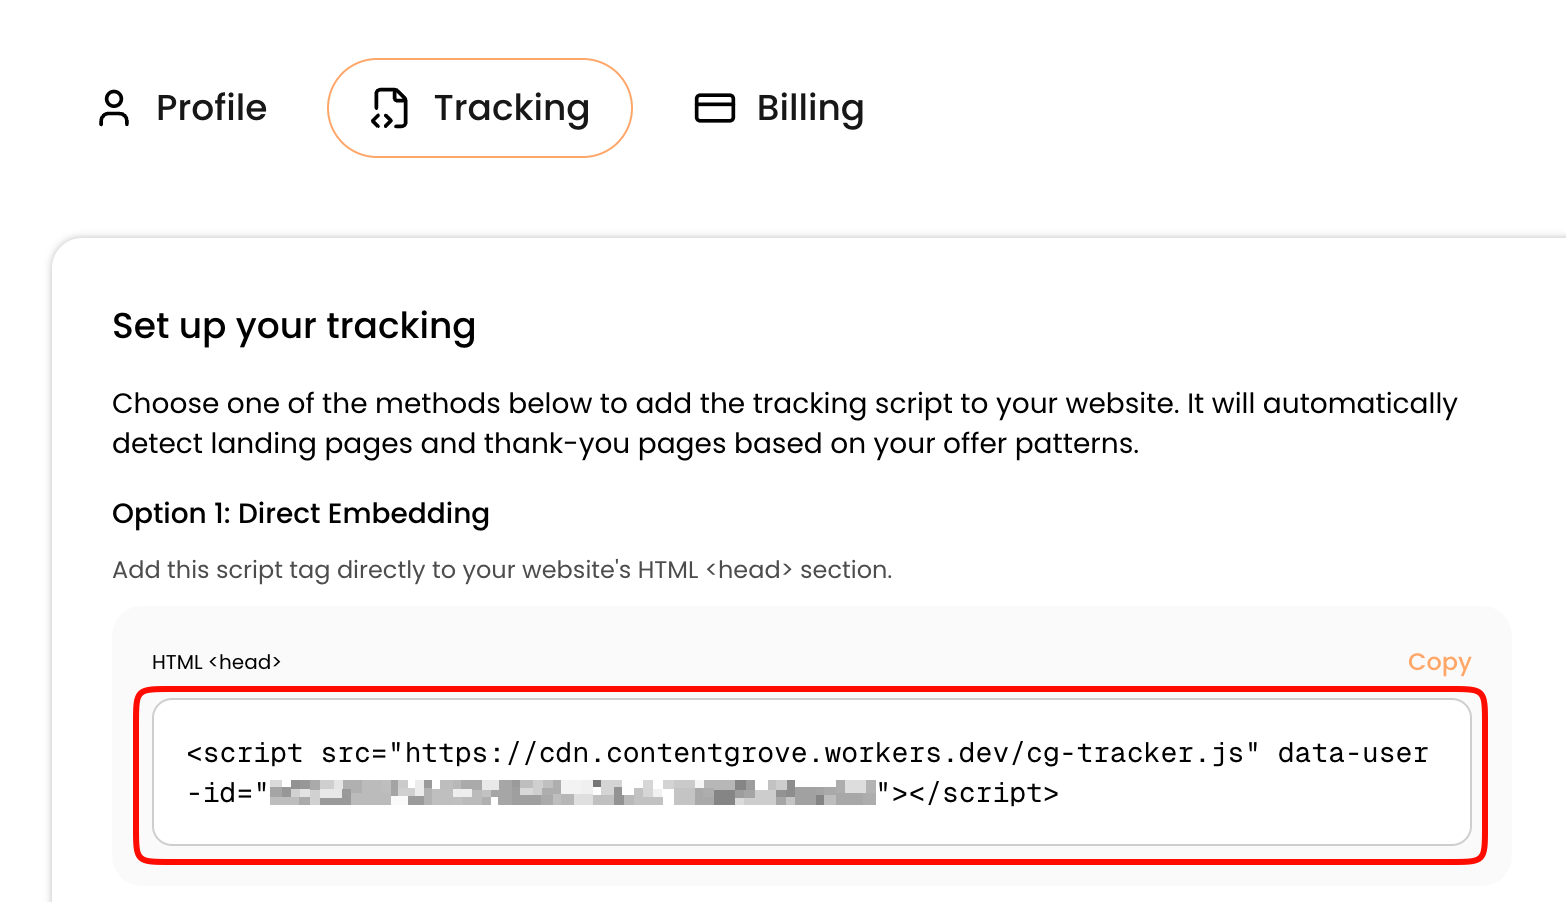
  <Step title="Paste your tracking code">
    Give the snippet a title, then paste your HTML tracking code from **Settings → Tracking** in contentgrove. See [Install the tracking script](/tracking/install-script) for the code.
    <Frame>
      <img src="https://mintcdn.com/contentgrove/M4nyy69B00uCNdVa/images/wordpress/05-title-and-code.png?fit=max&auto=format&n=M4nyy69B00uCNdVa&q=85&s=ec620f33f2382ff4fffe89171fd1e2ff" alt="Naming the snippet and pasting the contentgrove tracking code in WPCode" width="1600" height="735" data-path="images/wordpress/05-title-and-code.png" />
    </Frame>

    <Frame>
      <img src="https://mintcdn.com/contentgrove/M4nyy69B00uCNdVa/images/wordpress/06-paste-code.png?fit=max&auto=format&n=M4nyy69B00uCNdVa&q=85&s=e59676bb24008f69dcfcdd89cf094a97" alt="The contentgrove tracking code pasted into the WPCode editor" width="1566" height="902" data-path="images/wordpress/06-paste-code.png" />
    </Frame>
  </Step>

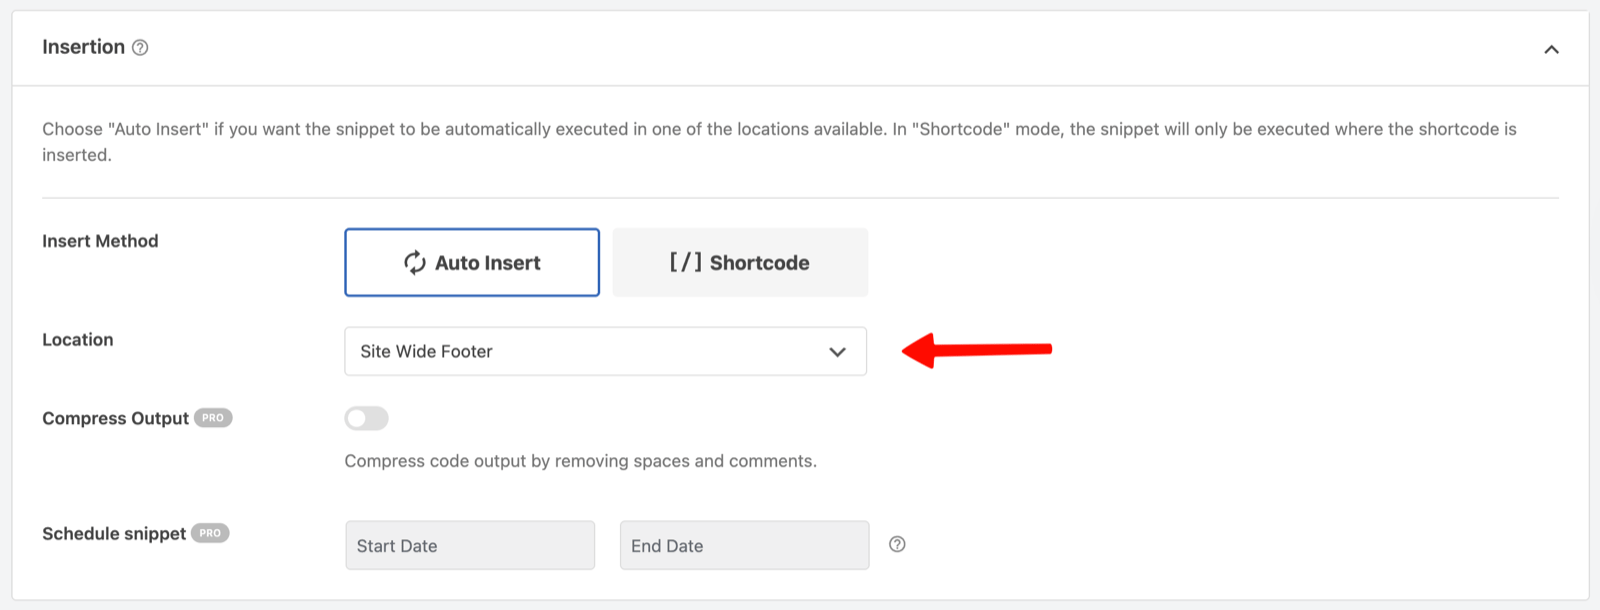
  <Step title="Set the location">
    Set the location to **Site Wide Footer**.
    <Frame>
      <img src="https://mintcdn.com/contentgrove/M4nyy69B00uCNdVa/images/wordpress/07-site-wide-footer.png?fit=max&auto=format&n=M4nyy69B00uCNdVa&q=85&s=5ac2d25028bb5d2c6b85b26384dd978c" alt="Setting the WPCode snippet location to Site Wide Footer" width="1600" height="610" data-path="images/wordpress/07-site-wide-footer.png" />
    </Frame>
  </Step>

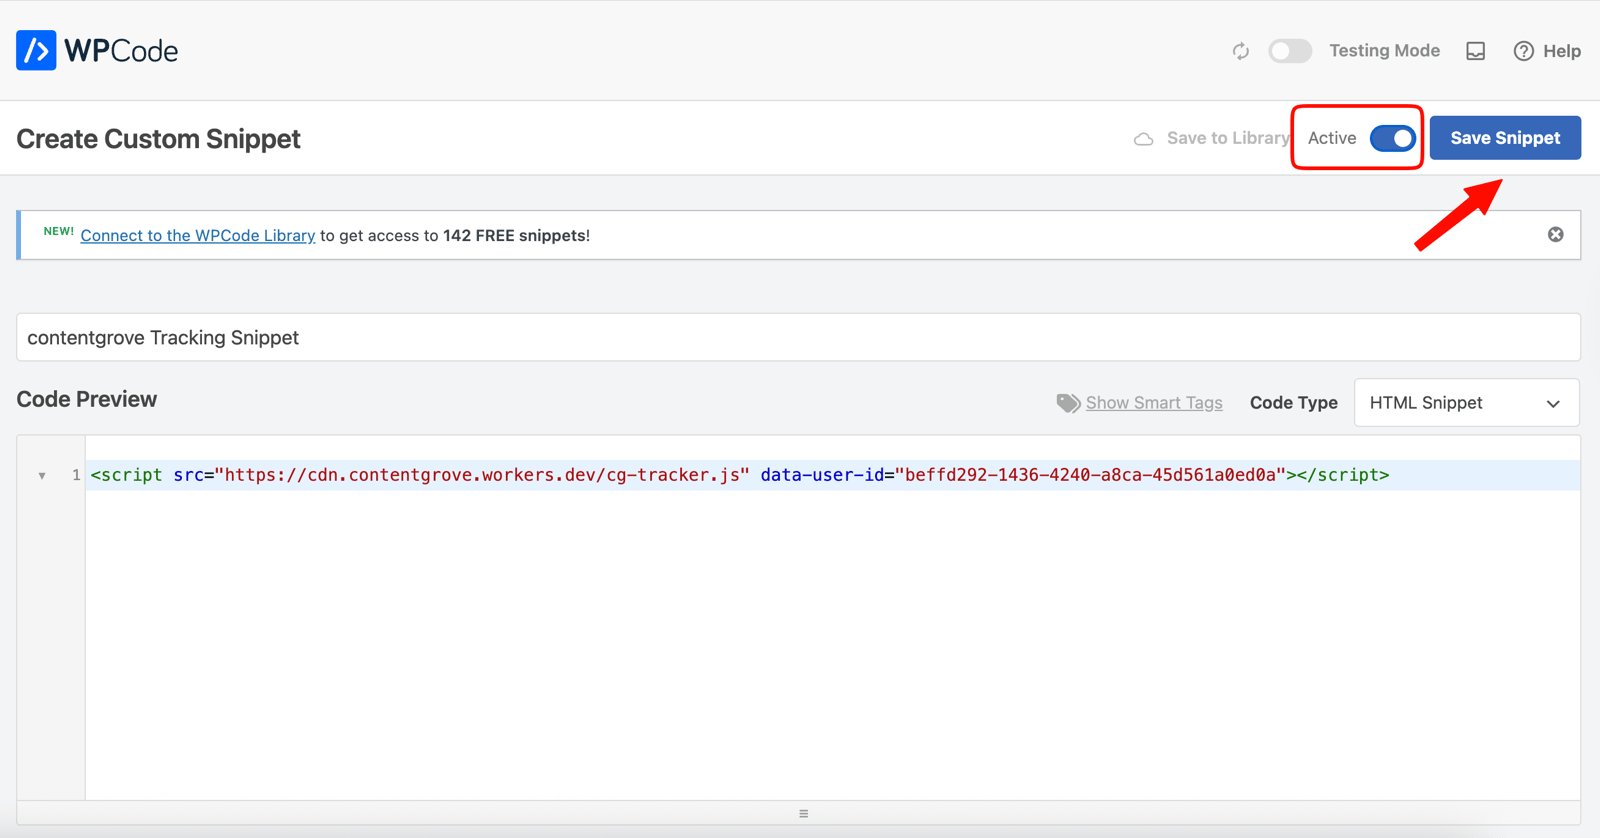
  <Step title="Activate and save">
    Toggle the snippet on and click **Save Snippet**.
    <Frame>
      <img src="https://mintcdn.com/contentgrove/M4nyy69B00uCNdVa/images/wordpress/08-activate-save.png?fit=max&auto=format&n=M4nyy69B00uCNdVa&q=85&s=f5d4e59e871cd1eb87dd0d47e85c94c7" alt="Activating the snippet and clicking Save Snippet in WPCode" width="1600" height="838" data-path="images/wordpress/08-activate-save.png" />
    </Frame>
  </Step>
</Steps>

## Verify it works

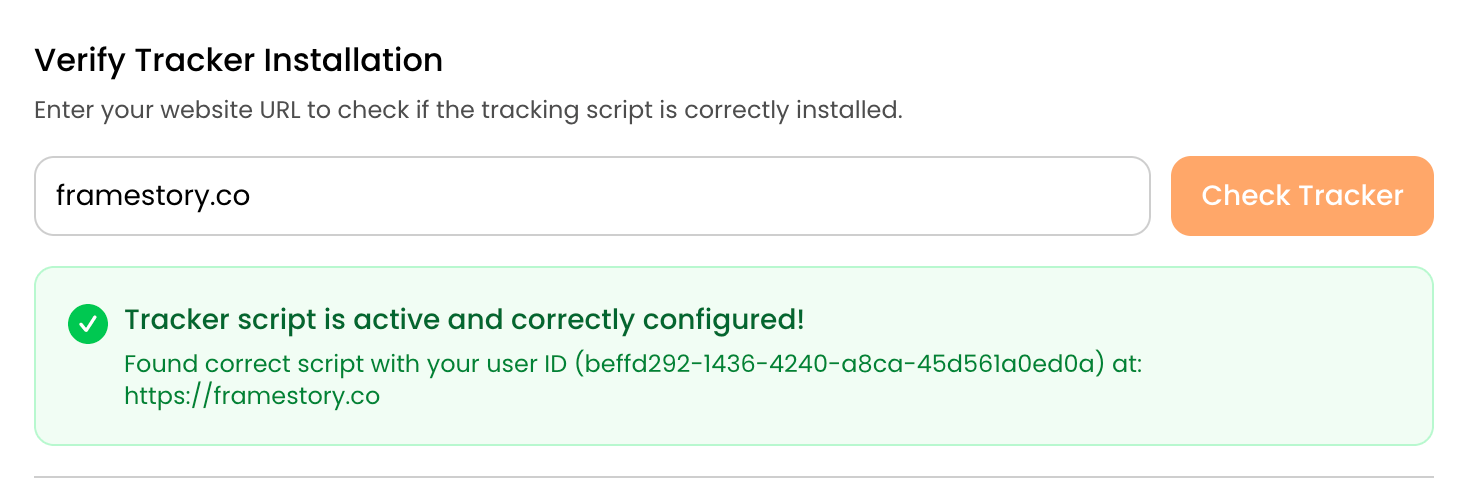
In contentgrove, open **Settings → Tracking**, use the **Verify tracker** tool, enter your website URL, and run the check.
<Frame>
  <img src="https://mintcdn.com/contentgrove/M4nyy69B00uCNdVa/images/wordpress/09-verify-tracker.png?fit=max&auto=format&n=M4nyy69B00uCNdVa&q=85&s=25c81e17ee1776ad262b395e037ed394" alt="Verifying the tracking installation from contentgrove settings" width="1476" height="480" data-path="images/wordpress/09-verify-tracker.png" />
</Frame>

If tracking isn't recording, see [Tracking isn't recording clicks](/troubleshooting/tracking-not-recording).