> ## Documentation Index
> Fetch the complete documentation index at: https://help.contentgrove.io/llms.txt
> Use this file to discover all available pages before exploring further.

# Install tracking with Google Tag Manager

> Install the contentgrove tracking script as a Custom HTML tag in Google Tag Manager, so it fires on any platform connected to your GTM container.

Google Tag Manager (GTM) lets you deploy the tracking script across any site that has GTM installed, without touching your site's code. You'll add the contentgrove snippet as a Custom HTML tag.

## Prerequisites

You need a GTM account and a container installed on your site. If you don't have one yet, create it at [tagmanager.google.com](https://tagmanager.google.com).

## Add the tag

<Steps>
  <Step title="Create a new tag">
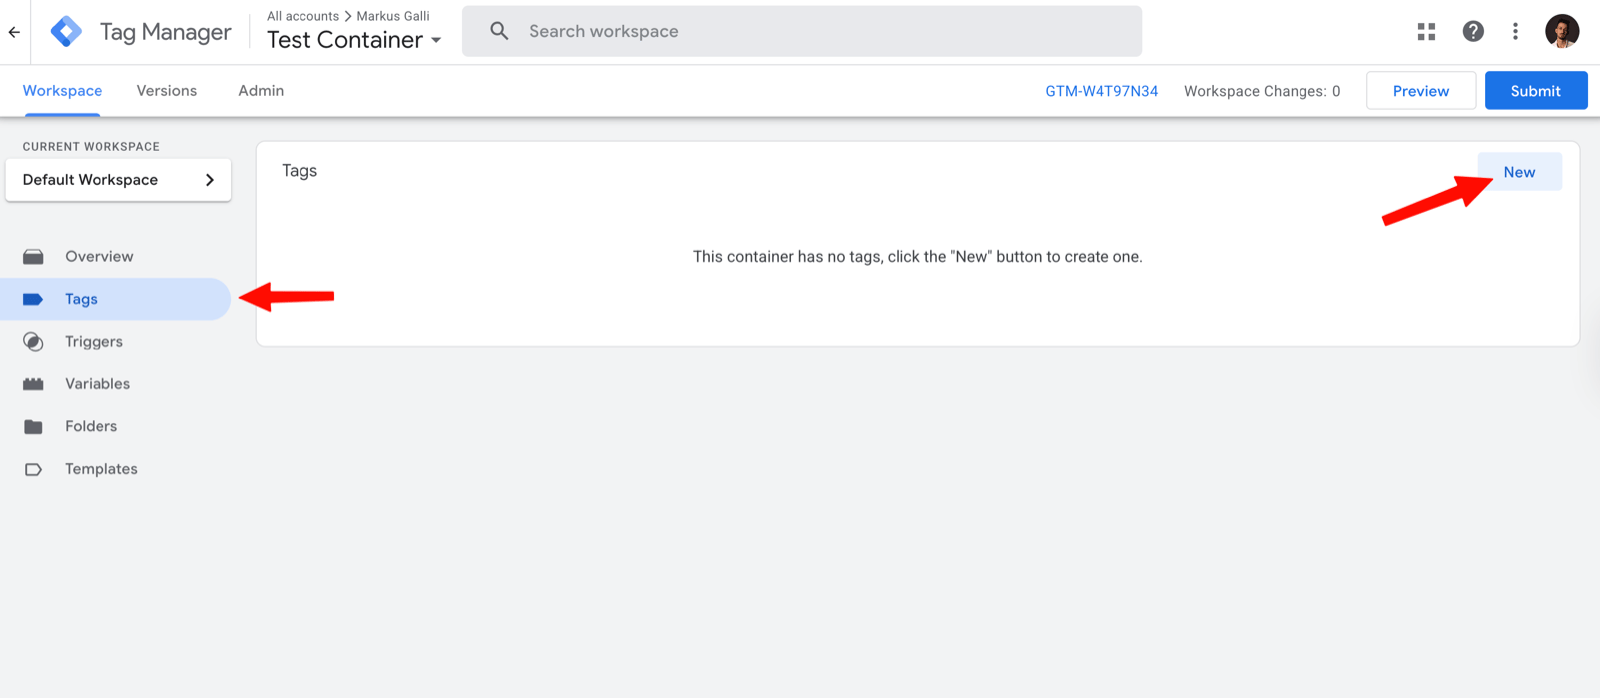
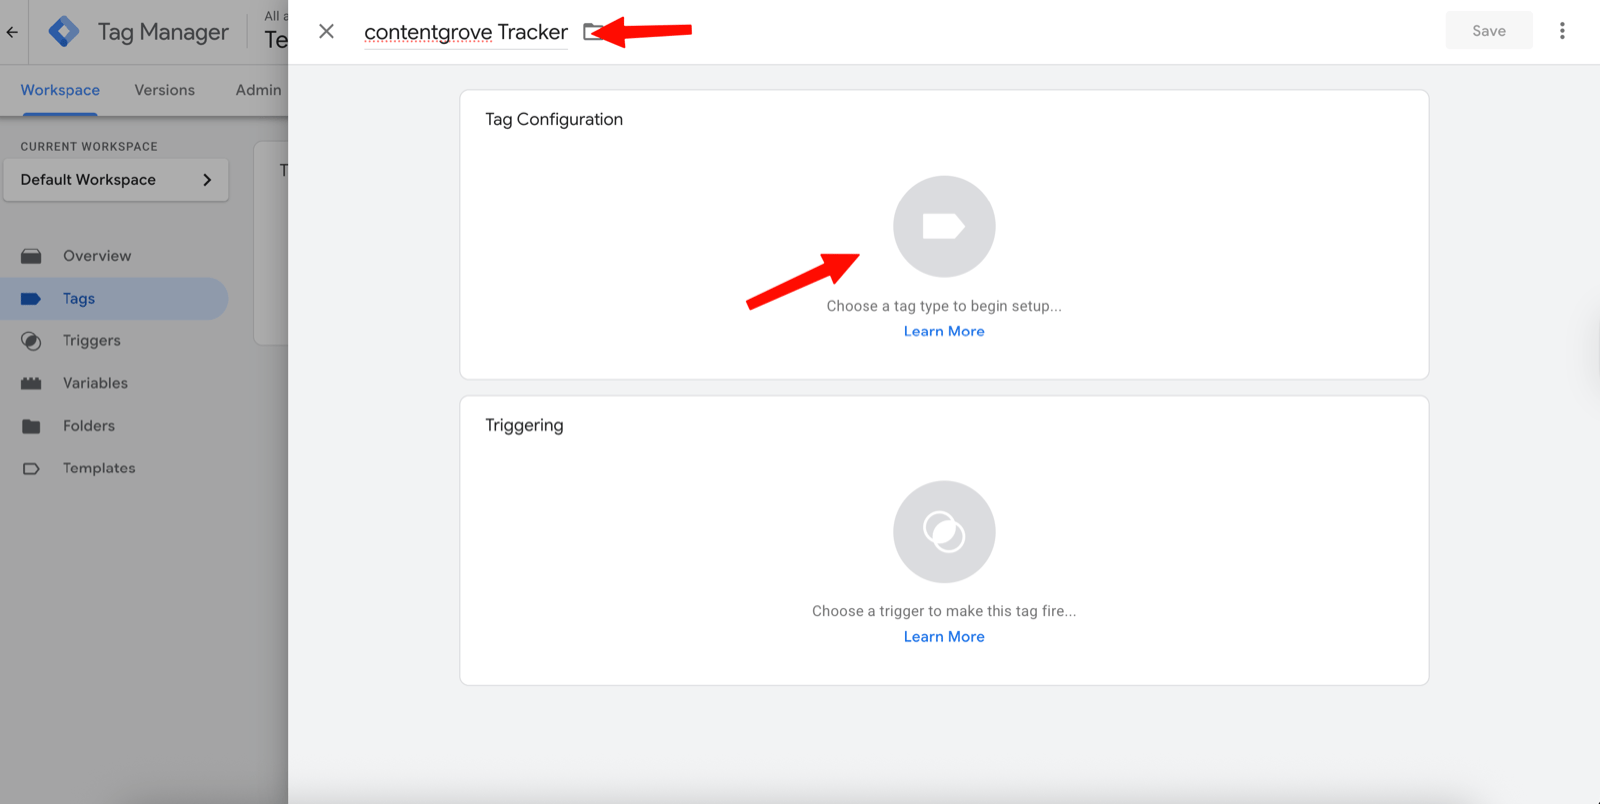
    In your GTM container, go to **Tags** and click **New**. Name it something like "contentgrove Tracker", then open **Tag Configuration**.
    <Frame>
      <img src="https://mintcdn.com/contentgrove/M4nyy69B00uCNdVa/images/gtm/01-new-tag.png?fit=max&auto=format&n=M4nyy69B00uCNdVa&q=85&s=cc7b9bcd42a88dfe5dff54bbdf6a375f" alt="Creating a new tag in the Tags section of Google Tag Manager" width="1600" height="698" data-path="images/gtm/01-new-tag.png" />
    </Frame>

    <Frame>
      <img src="https://mintcdn.com/contentgrove/M4nyy69B00uCNdVa/images/gtm/02-name-tag-config.png?fit=max&auto=format&n=M4nyy69B00uCNdVa&q=85&s=e1d10c6b41e5fa362c8310c19ba2488e" alt="Naming the tag and opening Tag Configuration in Google Tag Manager" width="1600" height="804" data-path="images/gtm/02-name-tag-config.png" />
    </Frame>
  </Step>

  <Step title="Choose Custom HTML">
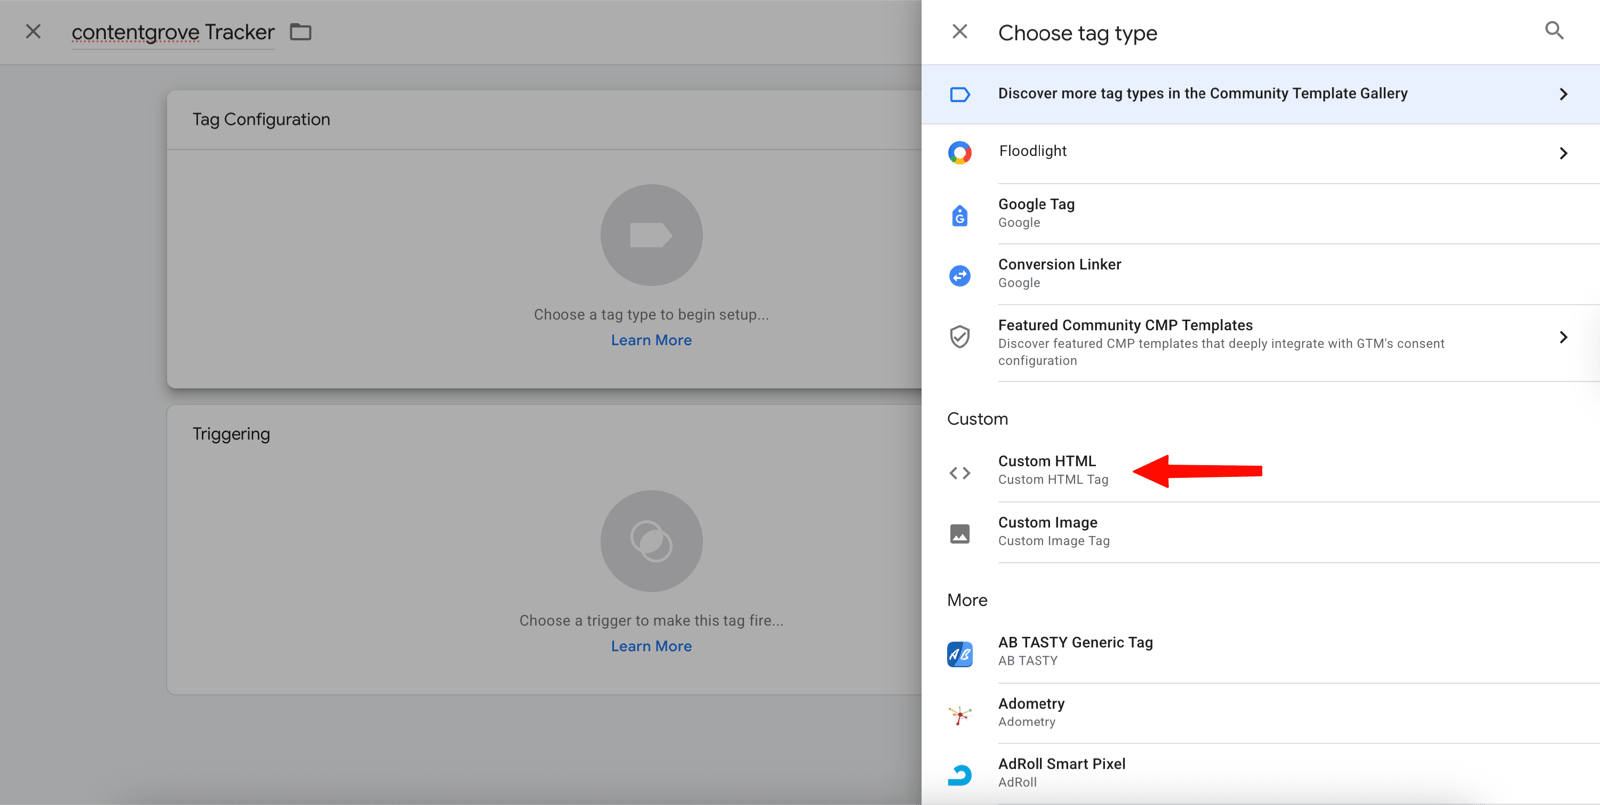
    Set the tag type to **Custom HTML**.

    <Frame>
      <img src="https://mintcdn.com/contentgrove/M4nyy69B00uCNdVa/images/gtm/03-custom-html.png?fit=max&auto=format&n=M4nyy69B00uCNdVa&q=85&s=c69228f85e0f25d32e39de223f9a1aca" alt="Selecting Custom HTML as the tag type in Google Tag Manager" width="1600" height="805" data-path="images/gtm/03-custom-html.png" />
    </Frame>
  </Step>

  <Step title="Paste the snippet">
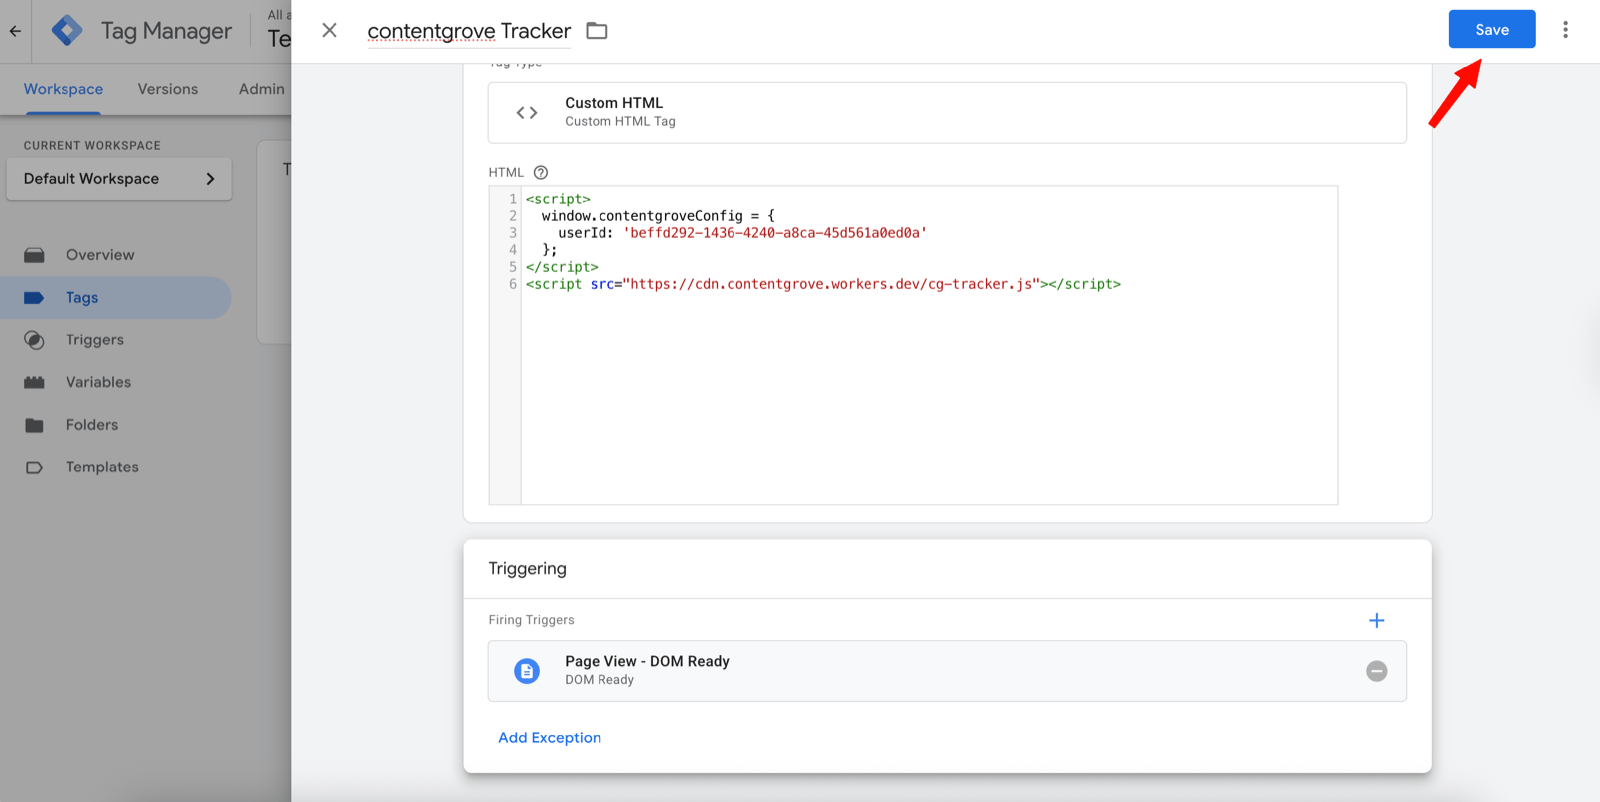
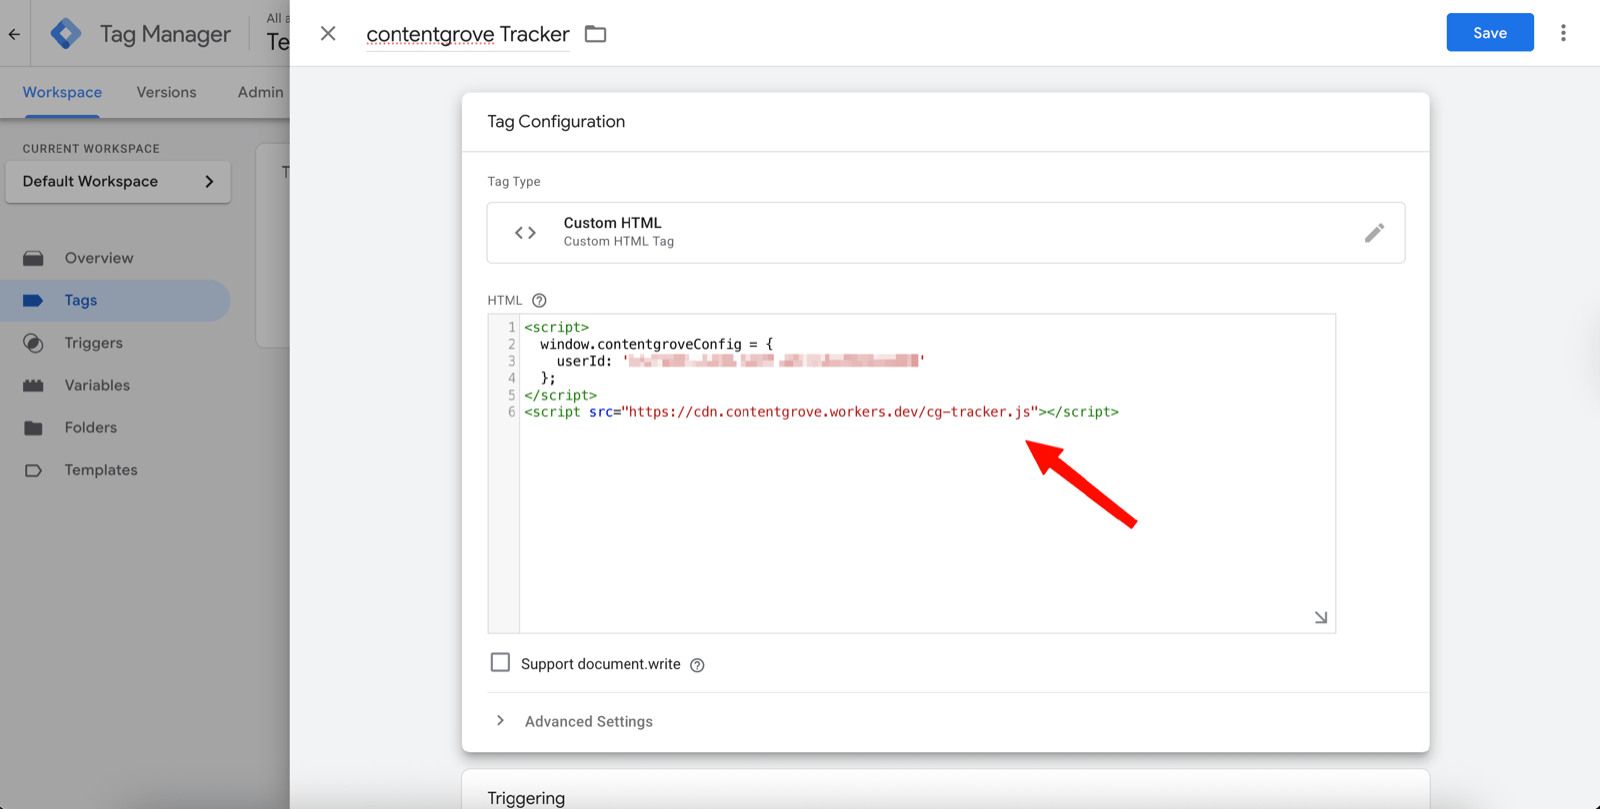
    Copy your GTM snippet from **Settings → Tracking** in contentgrove and paste it into the HTML field. See [Install the tracking script](/tracking/install-script#choose-an-installation-method) for the snippet format.
    <Frame>
      <img src="https://mintcdn.com/contentgrove/M4nyy69B00uCNdVa/images/gtm/04-insert-snippet.png?fit=max&auto=format&n=M4nyy69B00uCNdVa&q=85&s=79f8f305d5ee53d652fb46e3fd291293" alt="Pasting the contentgrove snippet into the Custom HTML field" width="1600" height="809" data-path="images/gtm/04-insert-snippet.png" />
    </Frame>
  </Step>

  <Step title="Set the trigger">
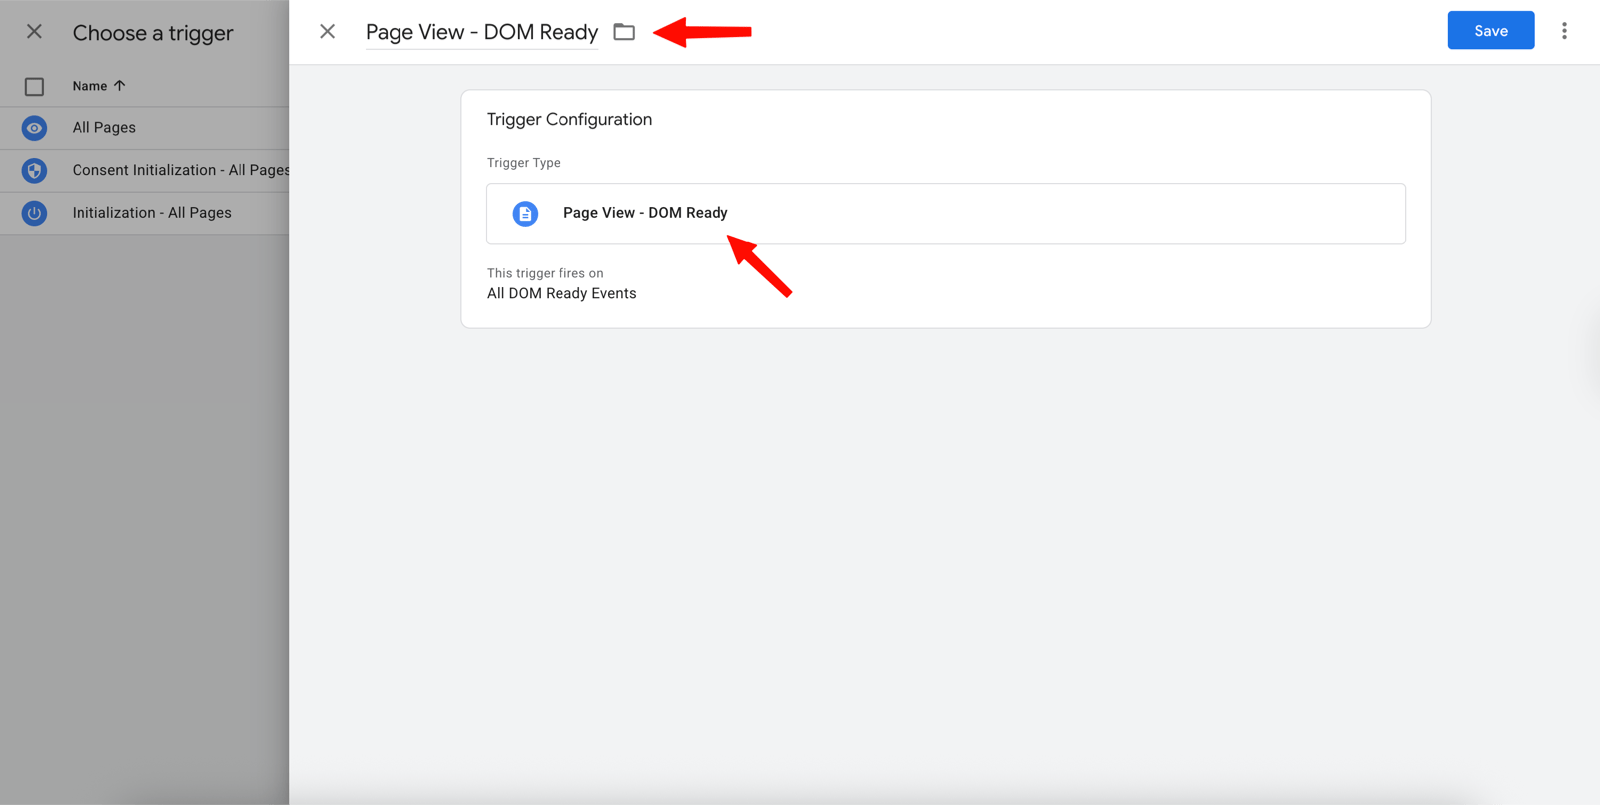
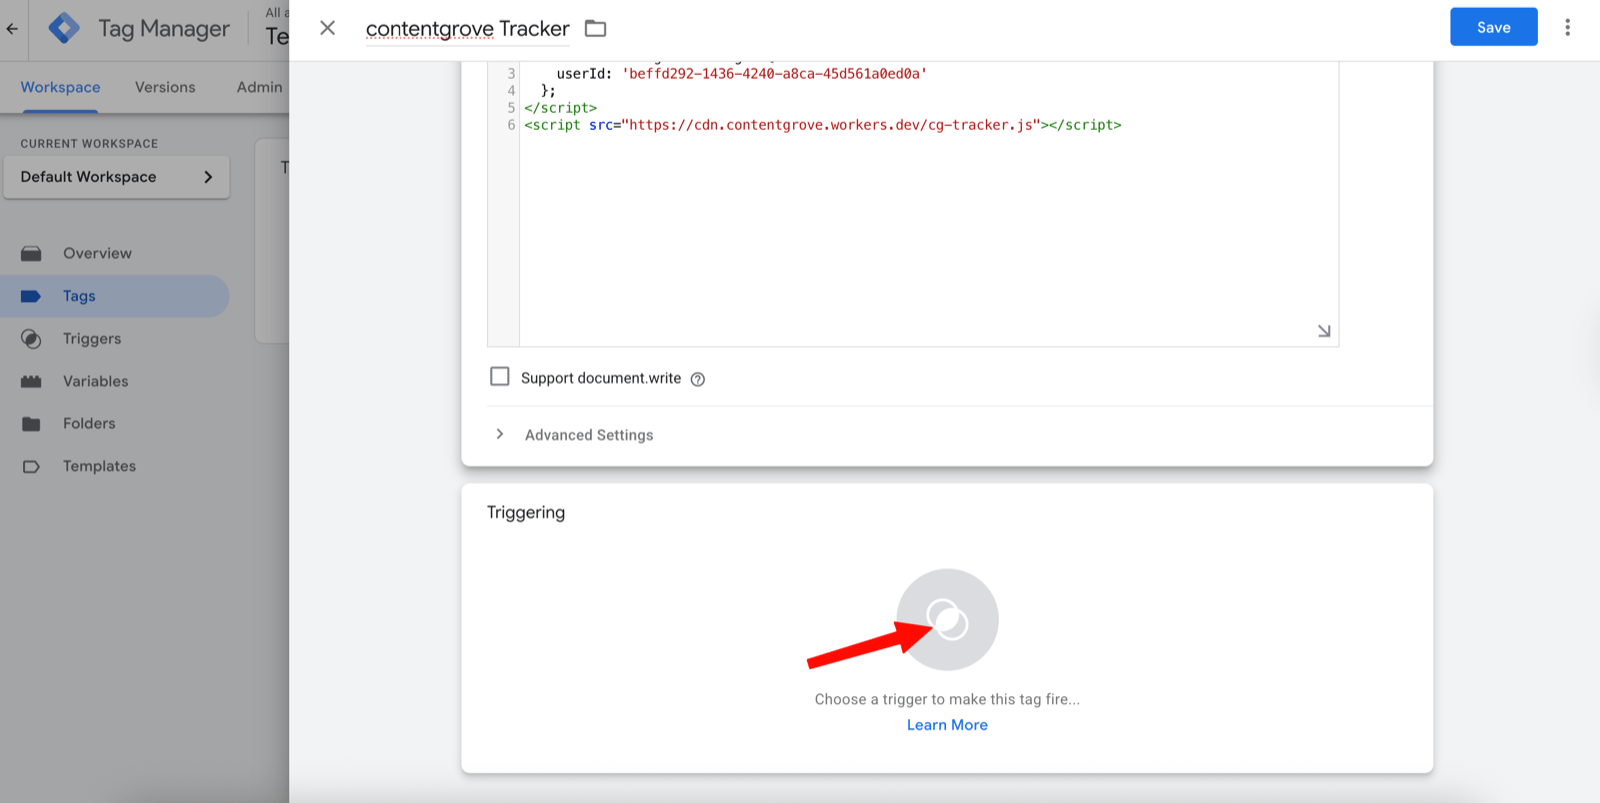
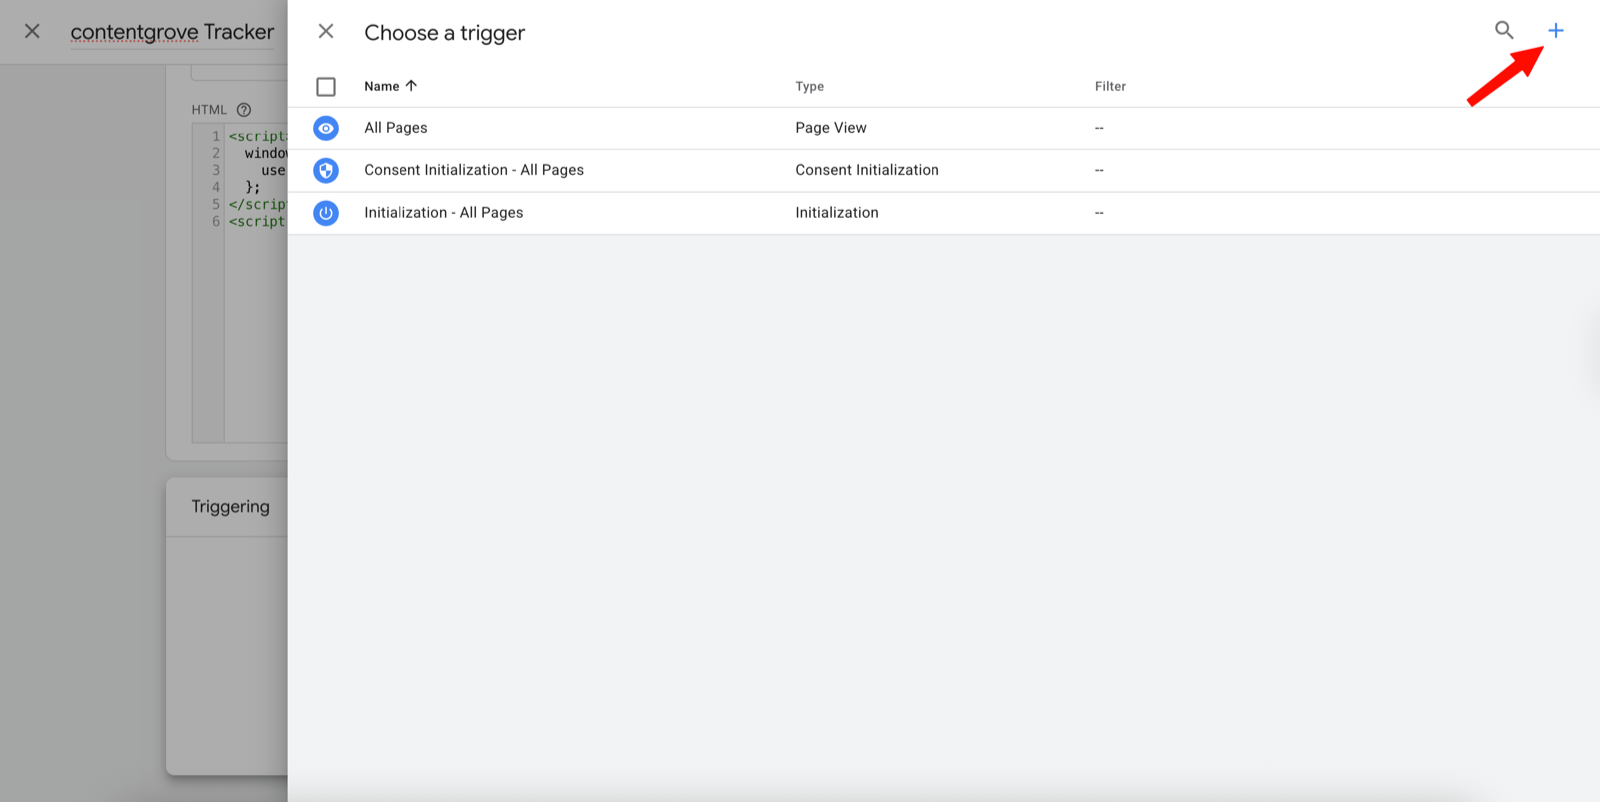
    Click **Triggering** and add a trigger of type **Page View – DOM Ready**. If you don't have one yet, click the plus icon to create it, name it, and save.
    <Frame>
      <img src="https://mintcdn.com/contentgrove/M4nyy69B00uCNdVa/images/gtm/06-triggering.png?fit=max&auto=format&n=M4nyy69B00uCNdVa&q=85&s=44424a28420bf060b803801c8941c5e5" alt="Opening Triggering to add a trigger in Google Tag Manager" width="1600" height="803" data-path="images/gtm/06-triggering.png" />
    </Frame>

    <Frame>
      <img src="https://mintcdn.com/contentgrove/M4nyy69B00uCNdVa/images/gtm/07-add-trigger.png?fit=max&auto=format&n=M4nyy69B00uCNdVa&q=85&s=b1830ed24bd0fee0b744cfacf80969ce" alt="Creating a new trigger with the plus icon in Google Tag Manager" width="1600" height="802" data-path="images/gtm/07-add-trigger.png" />
    </Frame>

    <Frame>
      <img src="https://mintcdn.com/contentgrove/M4nyy69B00uCNdVa/images/gtm/08-dom-ready.png?fit=max&auto=format&n=M4nyy69B00uCNdVa&q=85&s=27f02e85ca34482744150030382fbed6" alt="Selecting Page View – DOM Ready as the trigger type" width="1600" height="805" data-path="images/gtm/08-dom-ready.png" />
    </Frame>

    <Frame>
      <img src="https://mintcdn.com/contentgrove/M4nyy69B00uCNdVa/images/gtm/09-tag-overview.png?fit=max&auto=format&n=M4nyy69B00uCNdVa&q=85&s=5fc9a421f71c09200eb4683a15270c5d" alt="The completed contentgrove tag with its Custom HTML and DOM Ready trigger" width="1600" height="802" data-path="images/gtm/09-tag-overview.png" />
    </Frame>
  </Step>

  <Step title="Submit and publish">
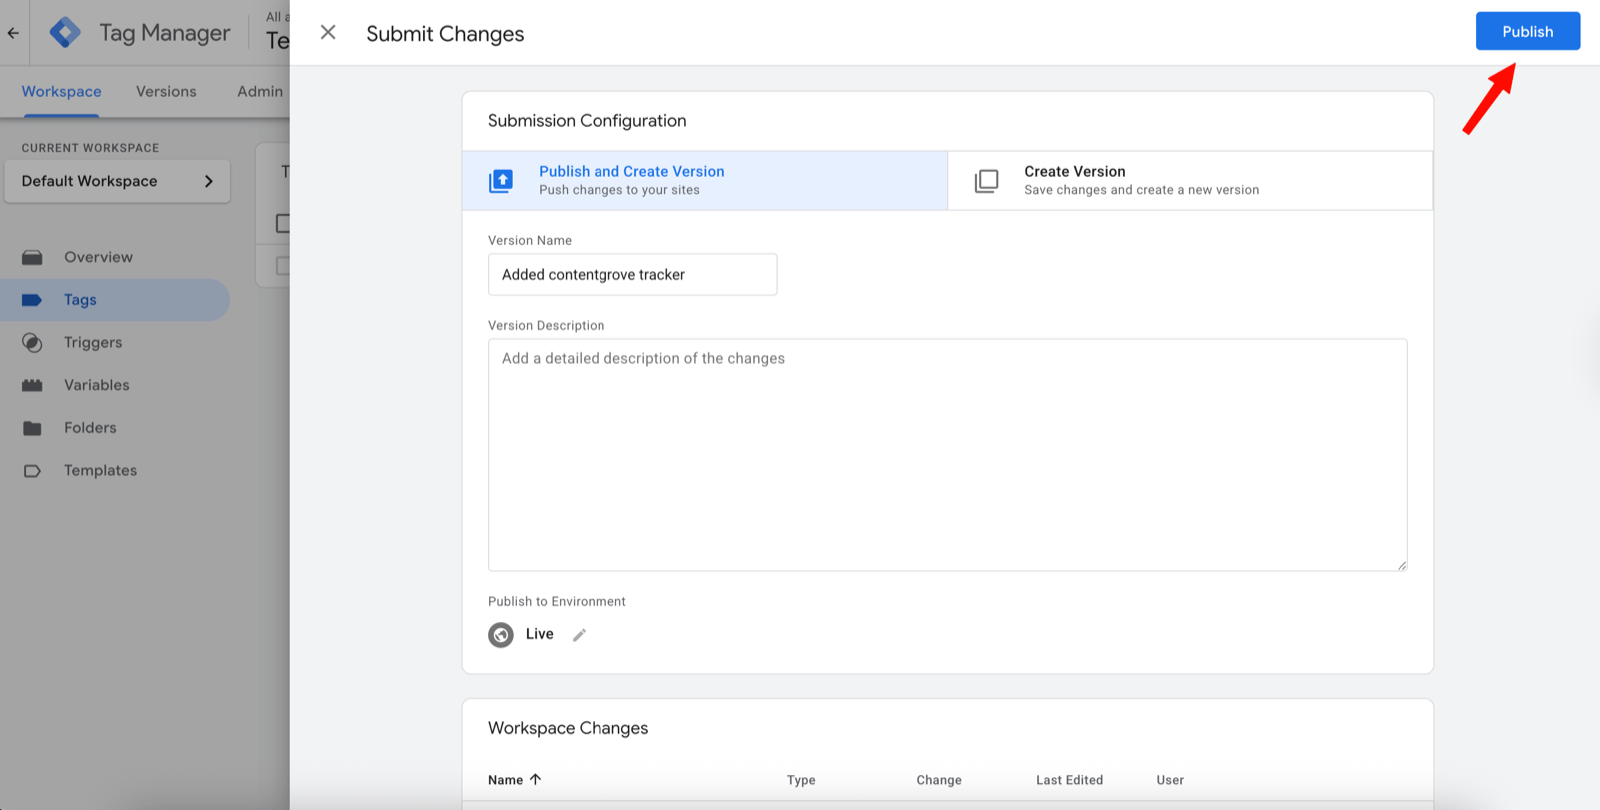
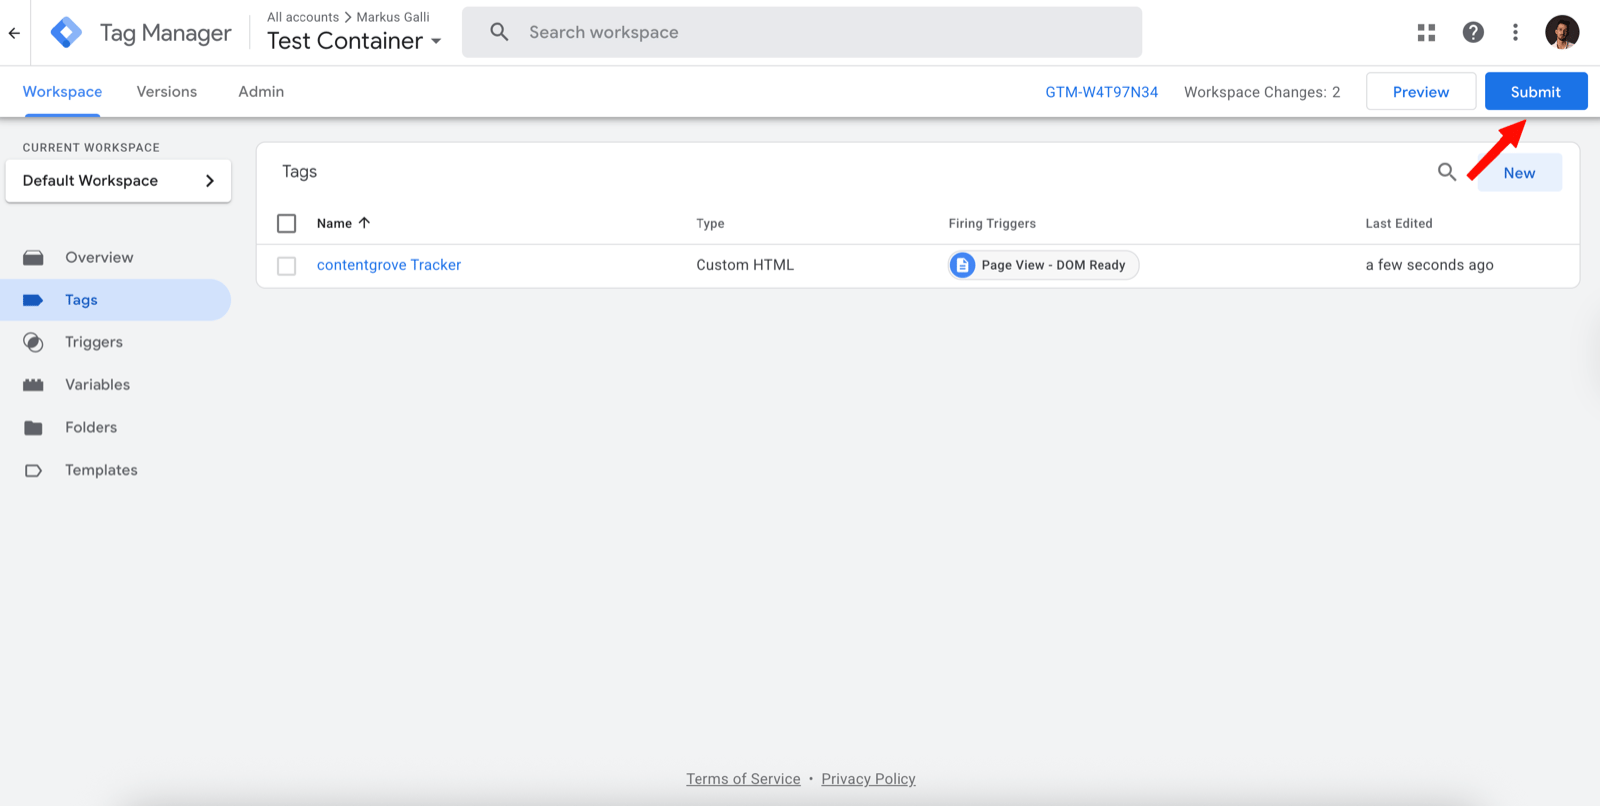
    Click **Submit**, then **Publish**. Without publishing, the tag won't be active.
    <Frame>
      <img src="https://mintcdn.com/contentgrove/M4nyy69B00uCNdVa/images/gtm/10-submit-publish.png?fit=max&auto=format&n=M4nyy69B00uCNdVa&q=85&s=626ebd2877ce51276c716f6d4acb29d3" alt="Clicking Submit to publish the container in Google Tag Manager" width="1600" height="806" data-path="images/gtm/10-submit-publish.png" />
    </Frame>

    <Frame>
      <img src="https://mintcdn.com/contentgrove/M4nyy69B00uCNdVa/images/gtm/11-publish.png?fit=max&auto=format&n=M4nyy69B00uCNdVa&q=85&s=8a45b03bbe8fd7fc7f7fd2fcc94fede1" alt="Confirming the publish in Google Tag Manager" width="1600" height="810" data-path="images/gtm/11-publish.png" />
    </Frame>

    <Frame>
      <img src="https://mintcdn.com/contentgrove/M4nyy69B00uCNdVa/images/gtm/12-done.png?fit=max&auto=format&n=M4nyy69B00uCNdVa&q=85&s=2dcf310227eee73f547ee61253639e3f" alt="The published contentgrove GTM tag, ready to track" width="1600" height="799" data-path="images/gtm/12-done.png" />
    </Frame>
  </Step>
</Steps>

<Warning>
  Use the **DOM Ready** trigger, not "Container Loaded". The wrong trigger is the most common reason GTM tracking doesn't fire.
</Warning>

## Verify it works

In contentgrove, open **Settings → Tracking** and use the **Verify tracker** tool. You can also use GTM's preview mode to confirm the tag fires on your pages.

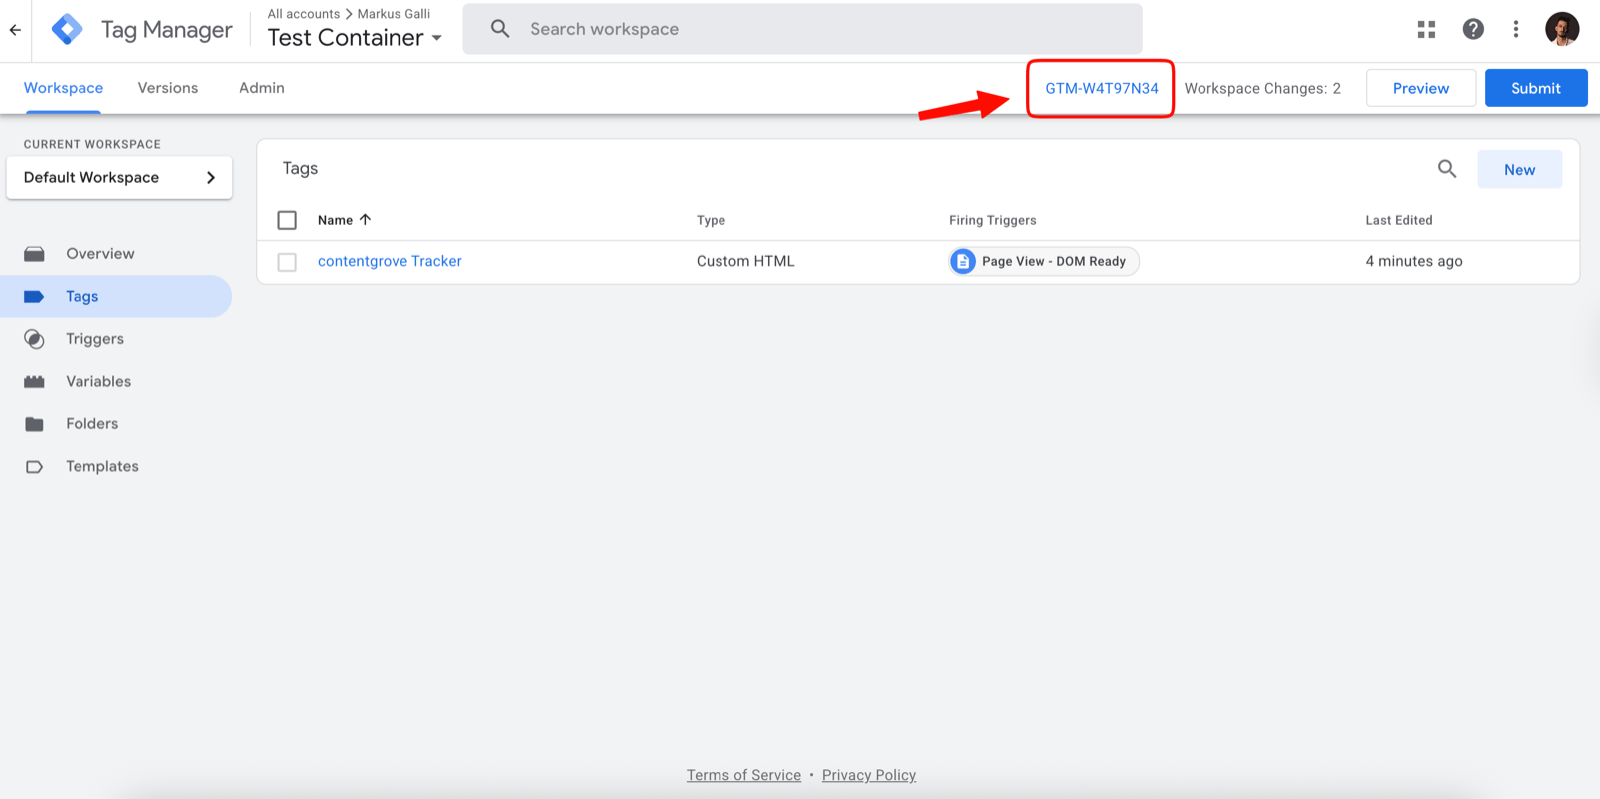
Once configured, you can deploy the same tag on any platform that supports GTM by adding your container ID (format `GTM-XXXXXXX`). If tracking isn't recording, see [Tracking isn't recording clicks](/troubleshooting/tracking-not-recording).